Setting up a self-hosted WordPress blog isn’t as difficult as you might think. This simple guide will show you how to start a blog and be up and running in no time.
STEP ONE: DECIDE WHAT TO BLOG ABOUT
Before you start a blog, you need to decide what you will blog about. This will be very helpful when you decide on your domain name. That’s the name that others are going to use to find your blog (more on that later).
First, think about why you want to start a blog. Do you have something to share that will be helpful to others? Are you going to use it to keep in touch with your family? Will it be an outlet or a way to hold yourself accountable?
That’s how best-selling author Ruth Soukup started her blogging journey. She was looking for a way to get her home and budget under control and documented her journey. Her story resonated with millions of other women and livingwellspendingless.com became a hit.
If you think you’ll want to monetize your blog, you should also do research on blog topics that can make money. This is called choosing a niche. A niche is a topic that you will write about most often on your blog.
Think about your interests, hobbies, accomplishments, and even difficulties that you have overcome. Your niche will likely be the ones that you are more passionate about. It will be the thing that you can talk about for hours. Or the problem that you overcame and want others to overcome too.
STEP TWO: CHOOSE A DOMAIN NAME
What is a domain name? The next step to starting your blog is to choose a domain name. As mentioned before, your domain name is the internet address others will use to find your blog. You should search domain names beforehand to see if the one you want is available or if it’s already taken.
Make sure that the name that you choose doesn’t conflict with an existing blog or website. You should also google the name that you choose to make sure that there aren’t too many businesses that already have that name.
Once you’ve found an available name, it’s time to purchase it. You can use a service like NameCheap or GoDaddy to purchase your domain name. But since you’ll want to get your website up and running immediately, let’s move to the next step. I’ll show you how to purchase your domain name and hosting at the same time.
STEP THREE: purchase your domain and hosting
What is hosting? Well, the hosting I’m talking about here is self-hosting as opposed to free hosting. I talk a little bit about the difference between the two in this post. As mentioned there, hosting refers to the place where all of the files for your blog are saved.
When someone clicks on a link for one of your blog posts, the file that they see is located on a server (basically a powerful computer with lots of storage) at your hosting provider. A hosting provider is a company where you will purchase your hosting package,
The hosting company that I recommend is Hostinger. It’s the company that I use for this blog and my other website. Hostinger offers beginner-friendly pricing and this is one of the main reasons that I chose this hosting company.
I didn’t want to start blogging on a free platform and then have to switch to a self-hosted platform. But I also didn’t want to have to pay almost $150 USD just to get started. Hostinger’s pricing was just right for me.
In addition to reasonable pricing, Hostinger offers fast load times (important to your blog visitors) and guarantees 99.9% uptime. They also have 24-hour support and a 30-day money-back guarantee.
Ok, so let’s move on to setting up your hosting account.
STEP FOUR: SET UP YOUR HOSTING ACCOUNT
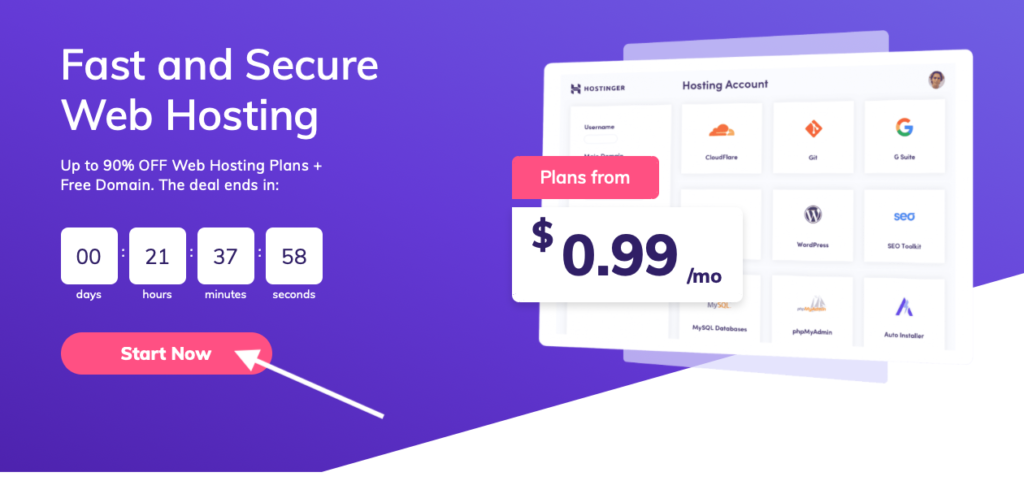
The first thing you’ll need to do is go to Hostinger’s home page and click the “Start Now” button.
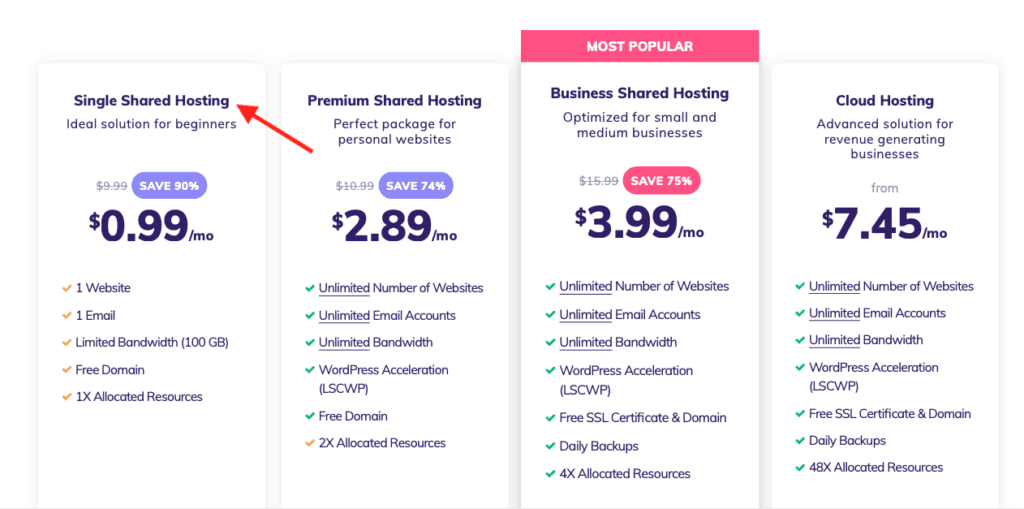
Next, you’ll choose your preferred hosting plan. You’ll see four plans each providing different features. At this time, all plans come with a free domain name. I recommend the Single Shared Hosting plan. You can always upgrade later if you need to.
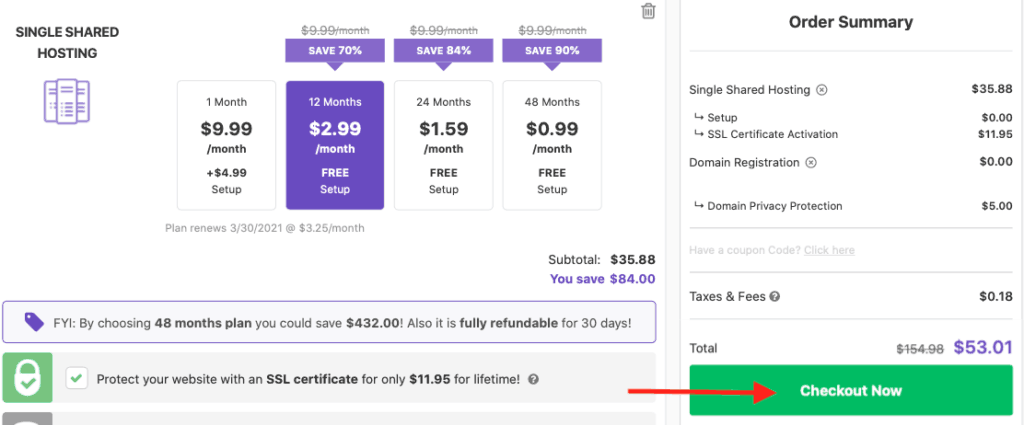
After selecting your plan you’ll need to select the time period for which you want to pay. By default, it’s set to 48 months. If you choose to pay for 48 months (Single Shared Hosting), you’ll save 90% on your hosting plan, but most people choose 12 months (you save 70%). That way you can decide in a year’s time if you want to stay or change hosting providers.
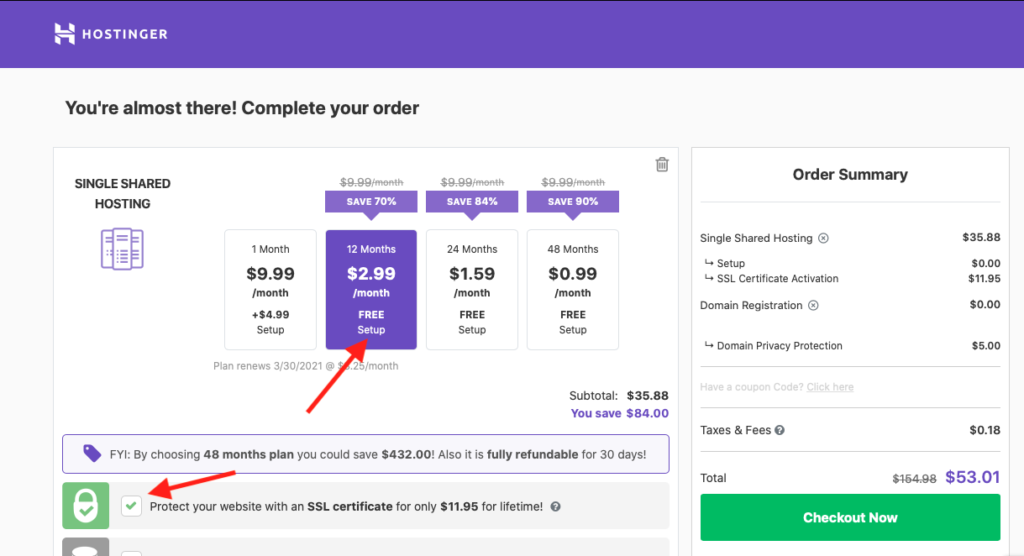
At this point, you can also opt to protect your site with a lifetime SSL certificate. An SSL certificate is what gives your website URL the HTTPS prefix rather than HTTP. In 2018, Google began flagging websites without an SSL certificate as unsafe.
Next, scroll down to choose your domain name (it’s free). Enter the domain name you want (make sure to double-check your spelling), and add it to your cart.

I would also recommend that you select the option to hide your domain name information. This prevents anyone who searches for information on your domain from seeing your contact details.
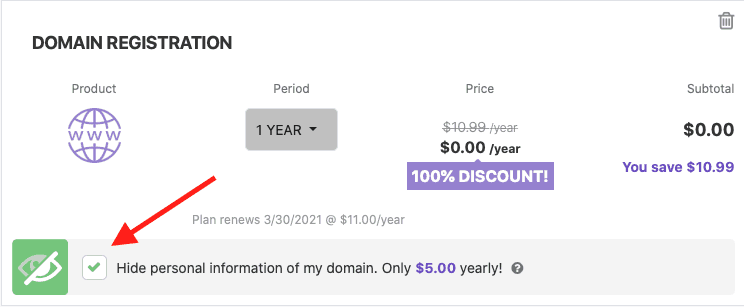
Once you’ve added your domain name and privacy protection to the cart, go ahead and click on the “Checkout Now” button.
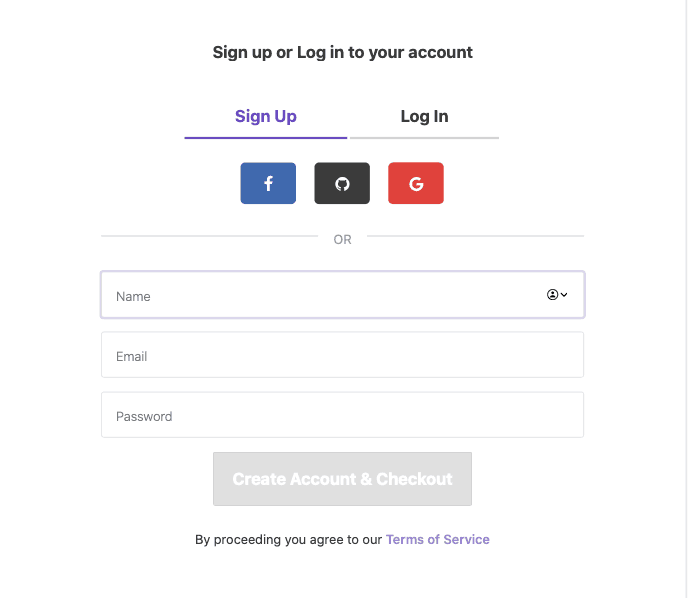
You’ll be asked to log in or create an account. Since this is your first purchase, you’ll need to create an account.
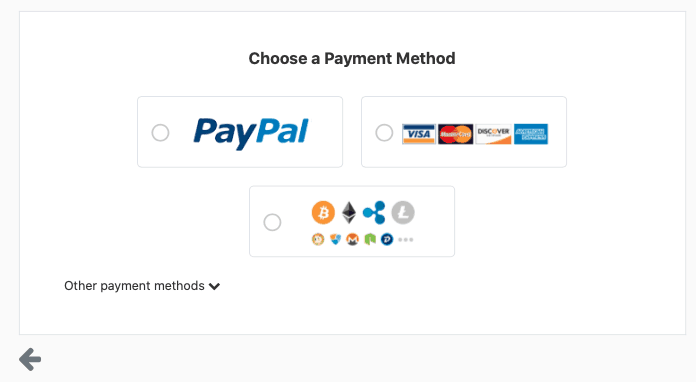
Next, you’ll choose your desired payment method.
And then enter your payment details.
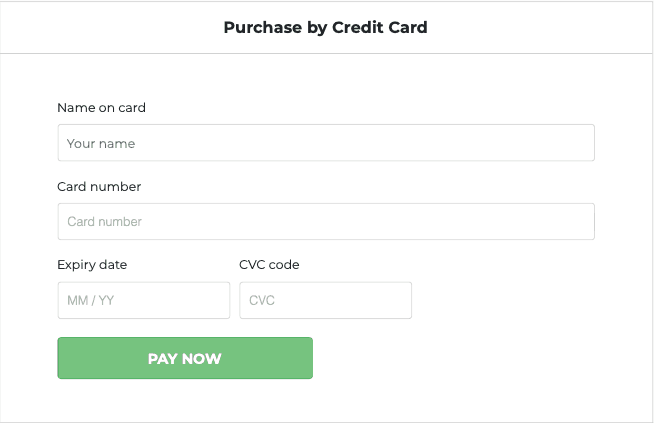
Click on “Pay Now” to complete your purchase.
Step fIVE: Install WordPress
Hooray! You’ve successfully purchased your hosting package with Hostinger. Let’s install WordPress so that you can begin blogging. Installing WordPress is a breeze. A few clicks and you’ll be done.
When you log in you should see a screen similar to the one below. If not, just click on “Hosting” in the top menu. This is where you’ll see the web hosting accounts you have purchased.

Click on the “Manage” button to go to your web hosting settings.
The next screen you see is the control panel of your web hosting. This is where you can view and change the settings for your web hosting.
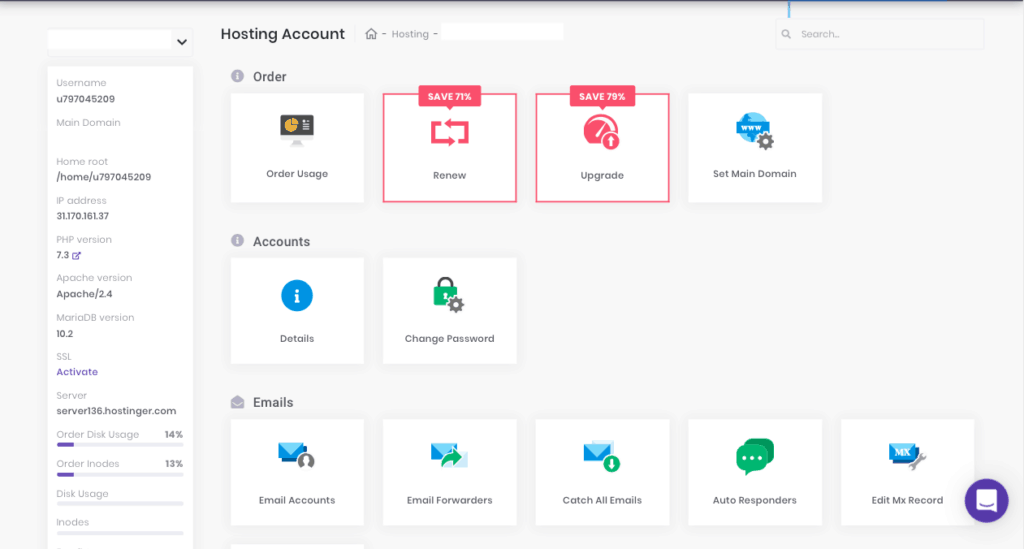
On the left side of your control panel, you can view information about your account like disk usage, bandwidth use, etc. On the right, you’ll see the many tools available to help you manage your hosting.
To install WordPress, you’ll need to scroll down a bit to the “Website” section and click on “Auto Installer”.
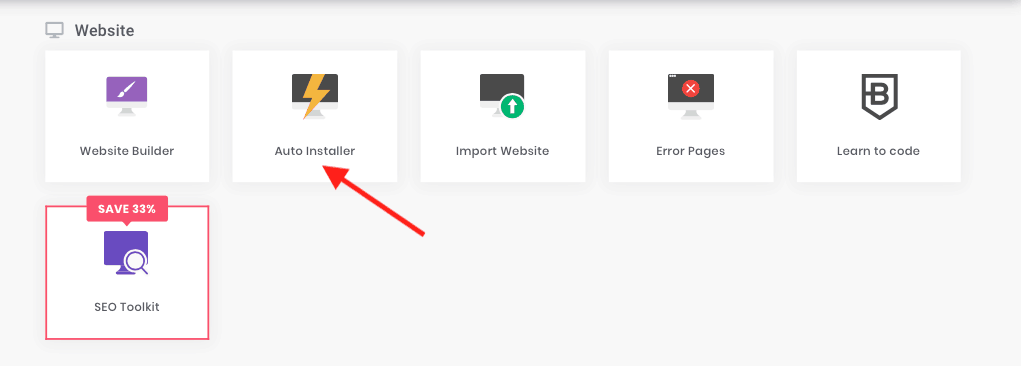
When you click on “Auto Installer“, you’ll see many different applications that can be installed on your website. You should see WordPress in the “Most Popular” section but if you don’t you can use the Search box to find it. Click on WordPress to start the installation process.
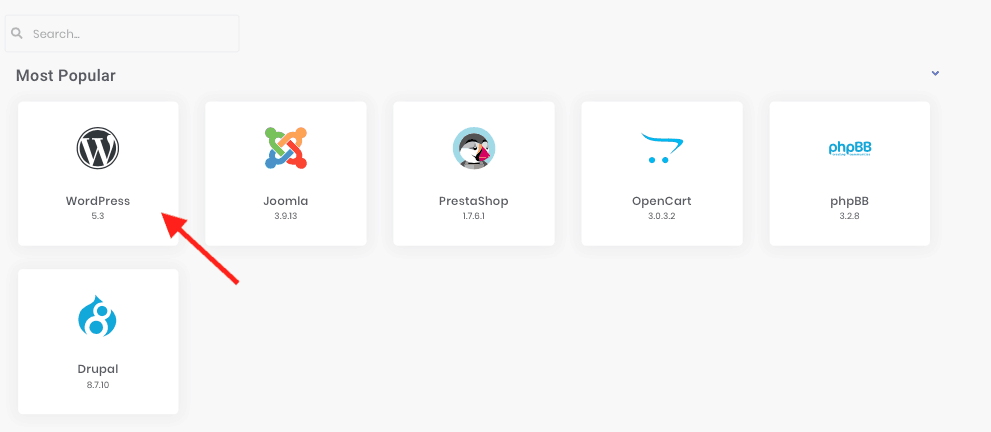
You’ll see a screen similar to the one below.
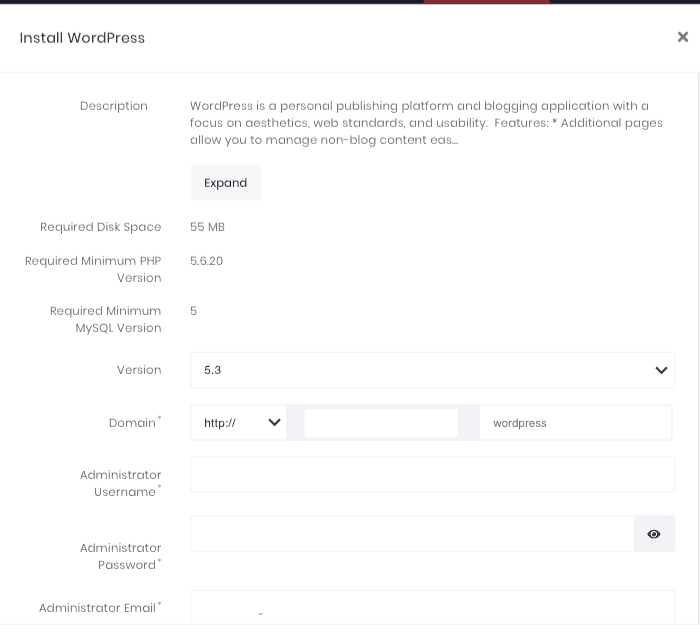
Enter the following details:
- URL ‒ the registered domain name that you just purchased; the address of your WordPress website.
- Language ‒ pick the primary language for WordPress.
- Administrator Username ‒ the username you’ll use to log into your website on WordPress.
- Administrator Password ‒ the password that you have to type in to enter the WordPress admin area.
- Administrator email ‒ enter an active email address. This is used for notifications and to reset your password if necessary.
- Website Title ‒ the title of your website
- Website Tagline ‒ A short description describing what your site is about.
And that’s it! You’ve installed WordPress on your website. Now, all that’s left to do is install a theme and a few recommended plugins and then start writing.
STEP SIX: theme and plugin setup
To log in to your new website you’ll need to go to http://yourdomainname.com/wp-admin and enter your user name and password.
This logs you into your WordPress dashboard. From here you can control everything on your WordPress site, like creating pages and categories, writing posts, and changing the appearance.
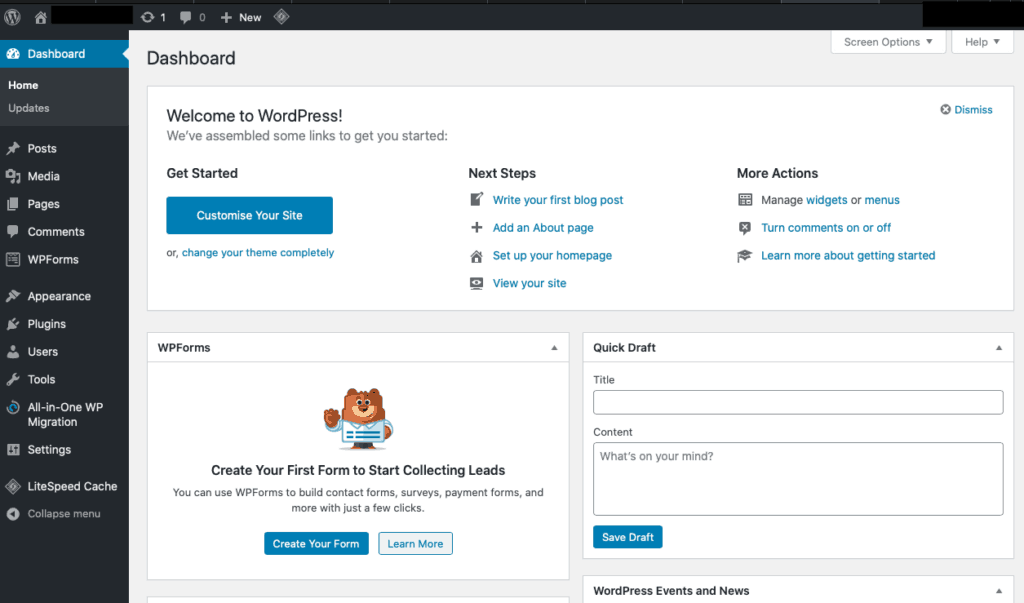
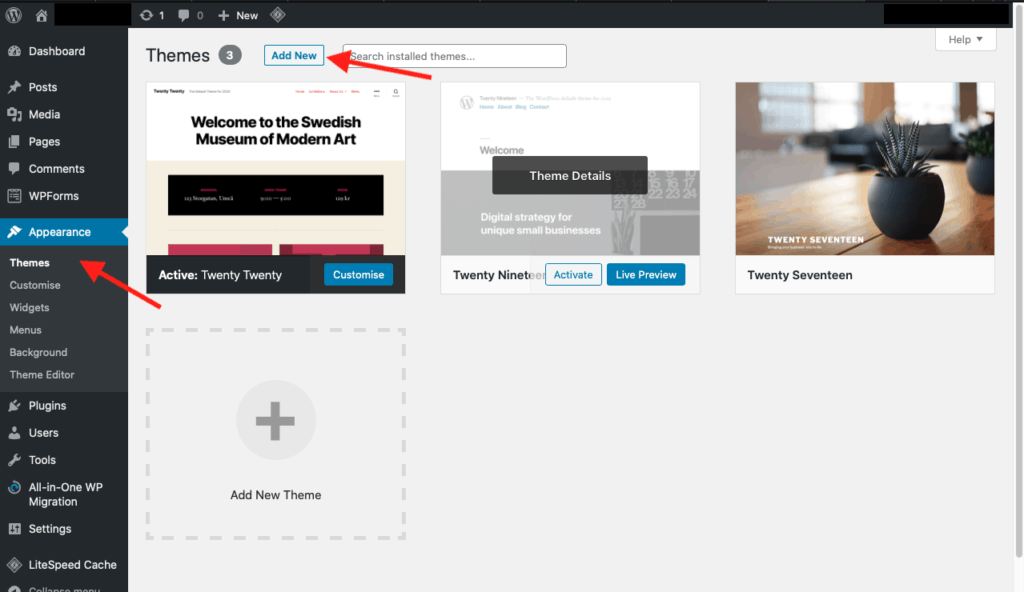
To choose your theme, go to Appearance in the menu on the left, then select Themes. You can choose one of the default themes shown or click on Add New to choose a theme from the gallery.
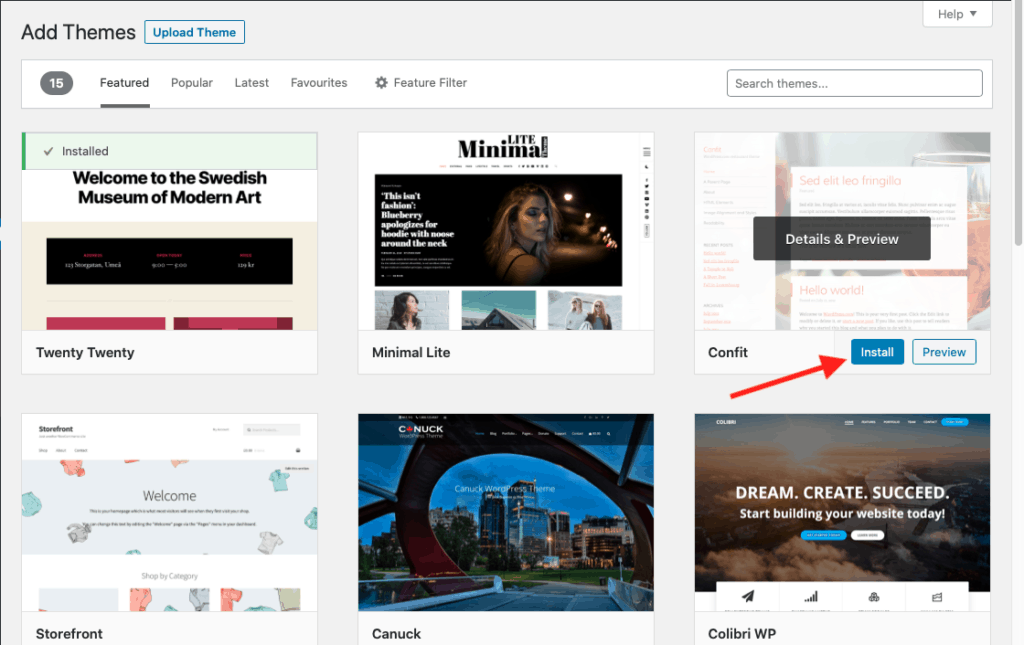
After you have selected your theme, click on “Install” and then “Activate” to install and activate it.
Next, you’ll need to install some recommended plugins. Installing a plugin is very similar to installing a theme. First, click on Plugins in the left menu and select Add New. Use the search box to find the plugin you need. Then click “Install” and then “Activate” to install and activate the plugin.
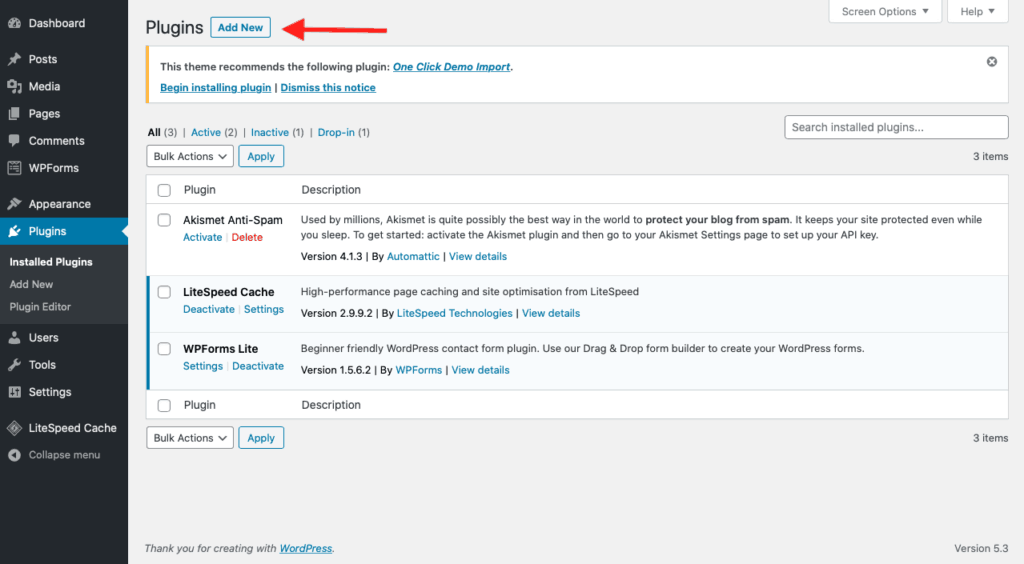
Here is a list of recommended plugins that you may want to install:
- Akismet or Antispam Bee – This should be one of the first plugins you install. It handles spam comments that will most certainly show up on your blog.
- WP Supercache – This plugin helps your site to load faster.
- Yoast SEO – Yoast WordPress SEO helps you to optimize your website to help search engines like Google to find it.
And that’s it! Congratulations! You’ve set up your blog and now you can start writing. To help you get more familiar with posting, creating pages and the rest of the WordPress environment, I recommend WPBeginner and the book WordPress To Go.
P.S. If you run into any problems setting up your self-hosted WordPress blog, contact me at deborah@asboldasthelion.com. We can discuss how I can help you (see my Linked-In profile). Happy Blogging!
